But first..before you do anything, make a copy of your current HTML..I repeat..make a copy of your current HTML...if you don't and you screw this up..I probably won't be able to help you fix it..one more time...make a copy of your current HTML!!
Screen shots are a bit small, so if you need to, zoom your page in..
go to the layout of your blog, get to this page...and click EDIT HTML
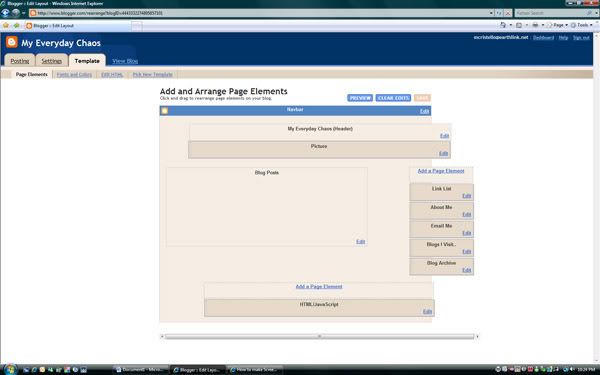
it will bring you to this page..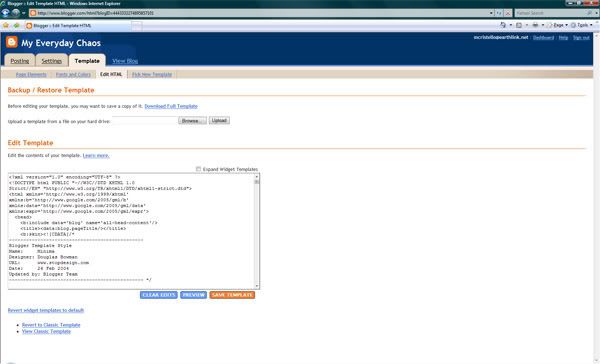
You will see right at the top where to save it. Alright, once you've saved it scroll down until you see this section of code
/* Outer-Wrapper
----------------------------------------------- */
#outer-wrapper {
width: 660px;
margin:0 auto;
padding:10px;
text-align:left;
font: $bodyfont;
}
#main-wrapper {
width: 410px;
float: left;
word-wrap: break-word; /* fix for long text breaking sidebar float in IE */
overflow: hidden; /* fix for long non-text content breaking IE sidebar float */
}
#sidebar-wrapper {
width: 220px;
float: right;
word-wrap: break-word; /* fix for long text breaking sidebar float in IE */
overflow: hidden; /* fix for long non-text content breaking IE sidebar float */
}
There are a few numbers that you are going to have to change...
change the outer wrapper to... width: 880px
change the main wrapper to.... width: 580px
change the side-bar wrapper to... width: 195px
Now if you want, can make your header bigger as well, you know, at the top where your banner is..to do this, scroll back up to this section of code and change the width to 750
#header-wrapper {
width:660px;
margin:0 auto 10px;
border:1px solid $bordercolor;
}
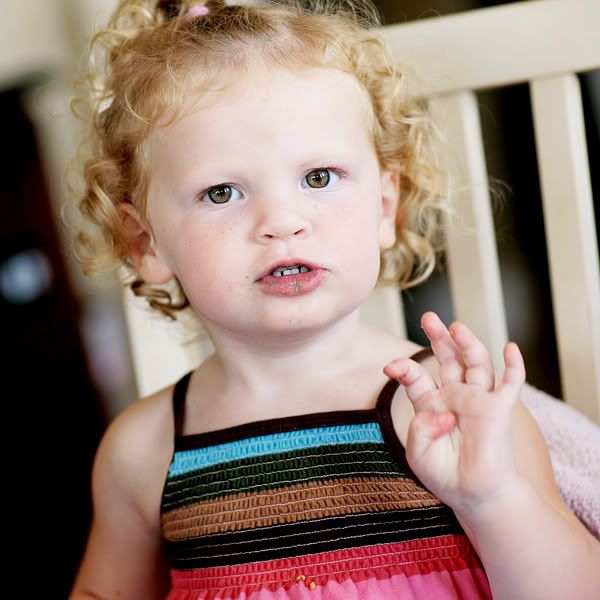
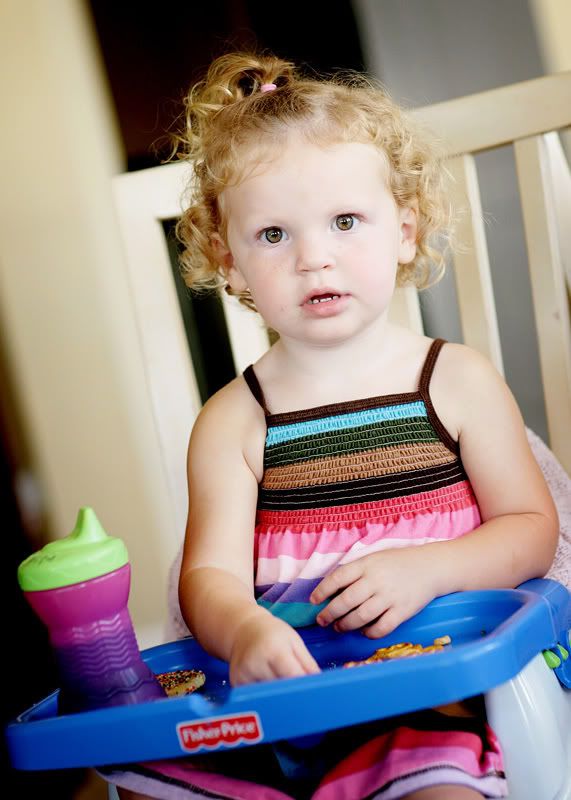
That's it so far..save template. Now, the next step..the photos, basically there are two parts to the uploading of pictures..first resize/sharpen for web and upload to photobucket, and then go back and edit the HTML of each picture..( to sharpen for web, after resize, I use 500 .1 0) not sure where I got those numbers, but it works for me.. I think most of you upload to photobucket already , but for those of you who don't go here.. www.photobucket.com and create an account, before uploading, you have to resize your photos to no larger than 600x800...Alright, to get big pictures..basically you have to decide what size you're going to want them on the blog..there are really only about four sizes I use..square, vertical, a bigger vertical, and horizontal.. when uploading a square cropped photo..resize to 600X600..this is the way it appears on the blog..excuse the photos, just lunchtime snapshots..
Next is vertical shots..resize image to 571X800..with this size image, you can either make it this big...
or a little bigger...
You can't make the horizontal to big..but, resize to 600X400..and you get this..

Basically when resizing..you can't go bigger than 600X800..you can try different crops and sizes..but just don't go larger than those numbers..or photobucket won't except image..
Alright, so now you've got your photos resized and uploaded to Photobucket..next...
After uploading image to blog, you have to go back and change the size of the image in HTML..when you look at the HTML of the photo you just uploaded you will see 400px..you need to change it to 600px for square, vertical, or horizontal images..if you want the vertical a little smaller change it to 500px...
I think that's it..gosh, I hope I'm making sense..it sounds a bit confusing, and tedious, but once you get the hang of it..it really quite easy and I think it makes your pictures look so much better..well worth the extra time spent.
Oh, one other random thought..when you upload your picture, and you sharpened for web, it's going to look way over-sharpened until resize the width in the HTML..
For those of you who have the older version of Blogger..your code may look like this..
/* Content
----------------------------------------------- */
@media all {
#content {
width:900px; I changed this....
margin:0 auto;
padding:0;
text-align:left;
}
#main {
width:650px; and this. =)
float:left;
}
#sidebar {
width:220px;
float:right;
color:#363636;
}
}
Just change your numbers to these..and then follow all other directions given..or visit this link..
http://blogger-tricks.blogspot.com/2006/05/how-to-change-width-of-content-and.html
Whew, I think that's it..really, I have no idea how I figured it out..I spent three days and nights messing with it..changing this number..and then that..I would not rest until I had it figured out...and I will say, I'm quite proud of myself for having done so. I am so not computer literate..and this type of stuff is usually way over my head..so friends, if I can figure it, so can you..if you get stuck, give me a shout, and I'll try to help you out..have fun, and happy blogging :)

23 comments:
thank you so much for sharing and takin the time to write that all out for us people who are craving the answers...lol.
I am going to give it a shot...i do have one more question for you though...i find that when l resize for the web my pictures are not as sharp and l read on your post that you resharp for the web....where ahd how do you do this...do you do it after the image as been resized or before and do you do it with the unsharp mask? Could you just fill me in on that...:)
Again thank you thank you and thank you...you made my day
Fantastic...thanks for all that hard work in posting all this info. Oh, and the 135 is MY next lens too:)
you're the best Megan! Can't wait to try this when i get home.
btw... thanks for the bacongrease email... i'm feeling much better about myself now. :)
LOL - you have totally LOST me with all this 'html geek speak' Megan! Good thing I am not using blogspot - because I am quite computer inept and would be frustrated to no end!
But I do already have that 135 in my camera bag! haha! My next on my wish list is the 85L! (it never ends does it?)
I love your pictures- I've been a fan of your super sharp photos for quite a while now.
There IS a way to make photobucket allow even bigger sized images. They can go up to 1024x768 with a free account. When you login to your account, right above the browse button there is " max image size: 640 x 480 (options)"
You click the options, which takes you to a new page, and you select the max size you want. Thanks for sharing such wonderful images
Thank you so much for taking the time to put this info on your Blog.
I just sat down and you made it so easy to figure out!
What lens do you use in most of your pics?
You have beautiful children.
THANK YOU! You are so nice to take the time to share that!!! AND...might I add BRILLIANT to be able to figure that out!!! I love the moving water...and great color in Adler's pic! As always...AMAZING!!!
Megan!! YOU ARE A ROCKSTAR!!! HAHAHAH!!! THANKS SO MUCH!!! and to remind me, that was so nice of you!! but I still want to learn on how you shot though, your images just sparkles, that what makes it stand out.
okay, Megan, here is tip for you, since you use photobucket, erase the phobucket.com link on your photo to prevent the left clicking on your photo. Now if you want to prevent the right click on your photo, send me an email at stephanyphotography@yahoo.com and I'll send you the html to block the right click of your gorgeous photos.
Thanks so much for your hard work on this one!
Thank you for this info!!!
Just one question...how do you prevent it from jumping to photobucket when you click on the picture? Yours just goes to a screen with the picture and nothing else...mine goes to the picture in photobucket.
THANK YOU for sharing this info! It has been so easy to do because of your GREAT directions! I really appreciate it!!!
Wow this is the best thing I have read in a long time. Thanks for sharing!
Just found this - thanks so much!
THANK YOU - THANK YOU - THANK YOU!!! I have been trying to figure this out for months!!!
I'm a snail at figuring this out, but by golly, it worked!
I didn't get the resharpen step (didn't see where to use it).
Thanks so much!!!
Thank you sooo much for sharing this! My question is how did you get the border around your photos in blogger NOT to show, i can't seem to get rid of them on my blog, i love the clean look of your photos without the thin border.
thanks again
darby
i'm so not computer savy but am trying to learn....i can't find out how to edit the pic html once i've uploaded my pic to blogger. and do you resize it on photobucket? i'm assuming you do your sharpening for web in photoshop right? any help would be greatly appreciated. how nice of you to share this fantastic information!
ok so i see the html for the pic in my posting section but for whatever reason my only half of my picture is showing on my blog when i post it...a very large half but unfortunately I need to figure out how to get the whole pic up. So sorry to bombard you with all of my questions. Thanks for you help.
I have a question I'm hoping you can help me out with. Your instructions were marvelous on how to get larger images on my blog, but I'm having trouble with my pictures being cut off because of the margin between the pics and the righthand sidebar. Do you have any idea how to reduce that margin? You can see the problem here: http://its-a-beauty-full-life.blogspot.com/2009/11/flowers.html
Thank you for all your help, this post on resizing is really marvelous!
[url=http://www.kfarbair.com][img]http://www.kfarbair.com/_images/logo.png[/img][/url]
בית מלון [url=http://www.kfarbair.com]כפר בעיר[/url] - שלווה, [url=http://www.kfarbair.com/about.html]חדרים[/url] מרווחים, אינטימיות, [url=http://kfarbair.com/services.html]שקט[/url] . אנו מציעים שירותי אירוח מיוחדים גם יש במקום שירות חדרים המכיל [url=http://www.kfarbair.com/eng/index.html]סעודות רומנטיות[/url] במחירים מפתיעים אשר מוגשות ישירות לחדרכם...
לפרטים נוספים נא גשו לעמוד המלון - [url=http://kfarbair.com]כפר בעיר[/url] [url=http://www.kfarbair.com/contact.html][img]http://www.kfarbair.com/_images/apixel.gif[/img][/url]
hi! i ve changed my template by your advices and everything went fine. BUT... blogger does not allow me to upload photos bigger than 271X400 (in the uploader window for photos). I select large image, then edit the photo's html, but the quality ''breaks'' and i see a lot of pixels... How can i upload a photo on it's original size (no larger than 600X800 as you said) Thanks in advance!
Post a Comment